VREnchanted is an art and craft blog. Here, we share tutorials as well as craft project ideas and I hope you will like them. Some of the projects include scrapbooks, mini albums, handmade cards, gifts boxes, 3D projects, Mixed media layouts, Photo frames and more.....
Welcome back to my blog...I am really excited to show you my new project which is a DT post for ItsyBitsy and MY VERY FIRST ATTEMPT at mixed media alter art. Can't even tell you how happy I am to show you this......When I began I was not sure about this and hence didn't shoot a video of the making process.....Looking back I really regret not doing it. however I have a pictorial tutorial on the ItsyBitsy blog waiting for all those who are interested to see how I altered this....So click HERE if you want to know more.
There are a few clicks of my project but I encourage you to got the ItsyBitsy blog where I have tons of pictures and other details for you all. Please let me know how you feel about this one as I was very nervous to begin with and would love to know your thoughts about this project.
I am linking this project at the following challenges running this month:-
Butterfly Challenge#84 - Butterflies +Y is for you choose and /or Wedgewood blue - I have incorporated a ton of butterflies in my project and I chose to do something new which I never tried - Mixed Media Alter.....
Mixed media Place - August challenge - Moodboard. The colors from the moodboard inspired the colors on my project.The bokeh effect was the inspiration behind the shiny pearls and microbeads.
Thank you so much for stopping by and have a great day ahead.
Hello my lovelies....
Has it ever happened to you.....a jingle or a song is stuck in your hear and you keep singing it again and again...even though you promise yourself you will stop.....it happened to me and the song that was stuck in my head was Whitney Houston's "And I will always love you....". No matter what I did It just wouldn't go away until I decided to do a project and finally write down the lyrics of this song on it.....It helped.
I am putting this project up at the following challenges:-
More Than Words - August 2017 Main Challenge - Harmony and song Lyrics- The song that inspired me to make this is "And I will always love you " by Whitney Houston and I added it to my project. My project is all about a vintage love story and If you are married for so long than it signifies peace and harmony is your bond. It reminded me of my parents and their strong relationship even after 40 years of their marriage......Touch Wood. Also, I wanted to make this kind of project for ever and now that its done...I can live in peace and harmony....lol.
Scrapy Land Challenge#72 - Anything goes used Die from Scrapy Land - I have used Elizabeth Craft Designs die curvy leaves which added the leaves to my project. Though a simple die....It add the finishing touches to my project.
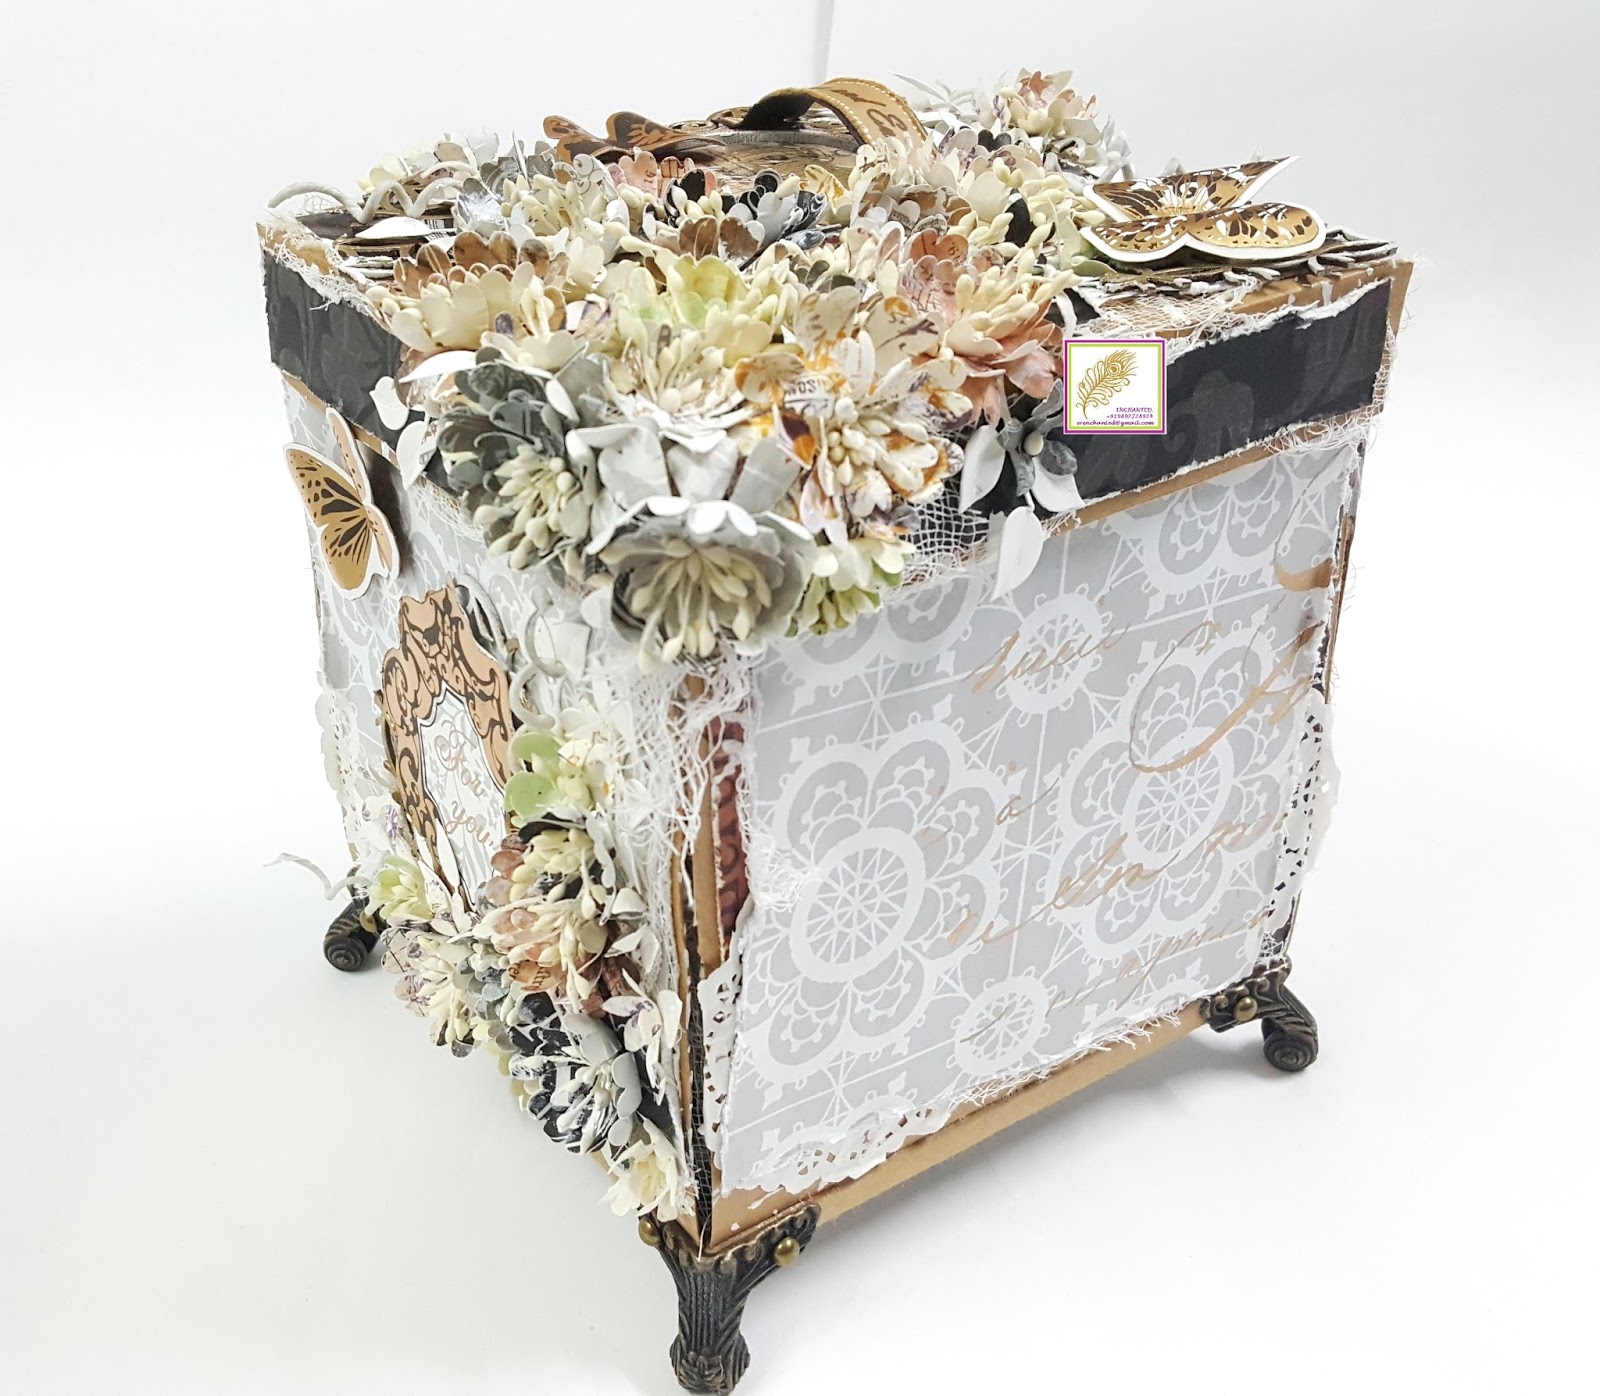
I have a explosion box for you all today which was something I wanted to do for quite some time now. Its Vintage and Shabby chic......But I have used Mixed Media to make this one. Something different and I am sure we do not see much of this style....atleast I couldn't find anything related to this on the internet. this song made me think of vintage love story and so this entire layout and design and colors I used is based on this theme...."A Vintage Love Story...." if I may.
I have a video walkthrough of this project which I encourage you to watch to know the box looks from every angle. I have few pics here but I felt the pictures do not do justice to this project even though I tried my best to click from every angle.
This box is 6"cube has 5 layers in all. There are a few picture mats and tags as well held in pockets and belly bands. So it can take around 52 pictures max and 6 journaling tags which can be also used for pictures. Few mats can be written on as well and I feel its pretty functional.
I have metal legs attached to this box which are place 1/2"from the ground and these are pretty sturdy legs. These solve 2 purposes - It safeguards my flowers from getting squished and it added to the vintage feel.....Isn't ti awesome.
I have used kraft cardstock (270gsm)to build this box which makes the box very sturdy. The last layer is 6"square and the following layers to the inside are 1/2" smaller from the predecessor. The innermost layer is 4"in size. I have used Eno greetings paper pack - Romantic for the box. The handmade flowers and layers and done using scraps from Eno Greetings Retro Series paper pack. I think it has scraps from 3 paper packs from Retro Series.
In the center is a very beautiful ornate chipboard frame which is adorned with flowers and butterflies along with the lyrics of this timeless song. The orante from is basically built by me. I sandwiched the same chipboard background design I used on the top between 2 chipboard frames from ItsyBitsy. This frame actually is a pack of chipboard shapes I bought long time ago.....its an Oldie as well. I added gesso and embossed it with Gold an white embossing powders from Wow. I am pretty happy with the way it looks and those butterflies are divine.
All the flowers are handmade and I used my basic sizzix dies for this. The leaves are diecuts from elizabeth craft designs - Curvy leaves. I did stencilling on everypage and added doilies and cheesecloth. All the stencils are from ItsyBitsy and so are the doilies. All the pages are distressed using Tim Holtz distressing tool.
Ont he top, I have a ornate chipboard frame and a Chipboard background embellishment from Itsybitsy. They are also heat embossed with gold and white to achieve this shabby feel....
I hope you liked my Explosion box. I have never done this style and I am very excited to share something new with you all. I hope all liked it as well.
Hey guys
I have a DT inspiration post for you all today for the Let's Craft and Create Challenge blog. The theme for this month is Hey Dude! and so I have a birthday card keeping this theme in mind. This challenge runs for an entire month and you still have 2 weeks to put in your entries. Please click the link HERE to go the challenge blog.
I am putting this card up at the following blog challenges:
This is a fairly simple card and it took me hardly 15mins to do this.So I started with a standard A2 size card base in white and stamped balloons on it using 4 different distress inks...all in the shades of blue....Tumbles Glass, Mermaid Lagoon, Salty ocean and Faded Jeans. I stamped the same image with different colors in each row. You can add more rows with more shades but I had 4 shades and so I did 4 rows.
What's the fun of using distress inks without a little water... so I sprinkled a little water and waited for the magic to happen. Lifted the water with a tissue napkin and dried my card with a heating tool.
Then, I added silver strings to my balloons with a silver sparkle pen....but i did not press my pen too much and lightly drew all the strings using a t- ruler.
To finish my card, I stamped the sentiment with versamark and Black embossing powder from Wow. Sprinkled some fun sequins to give it a little hit of sparkle.
So here I finish my quick and easy birthday card...I hope you liked it and will give it a try. Thank you for reading this post and have a great day ahead.
Hey guys
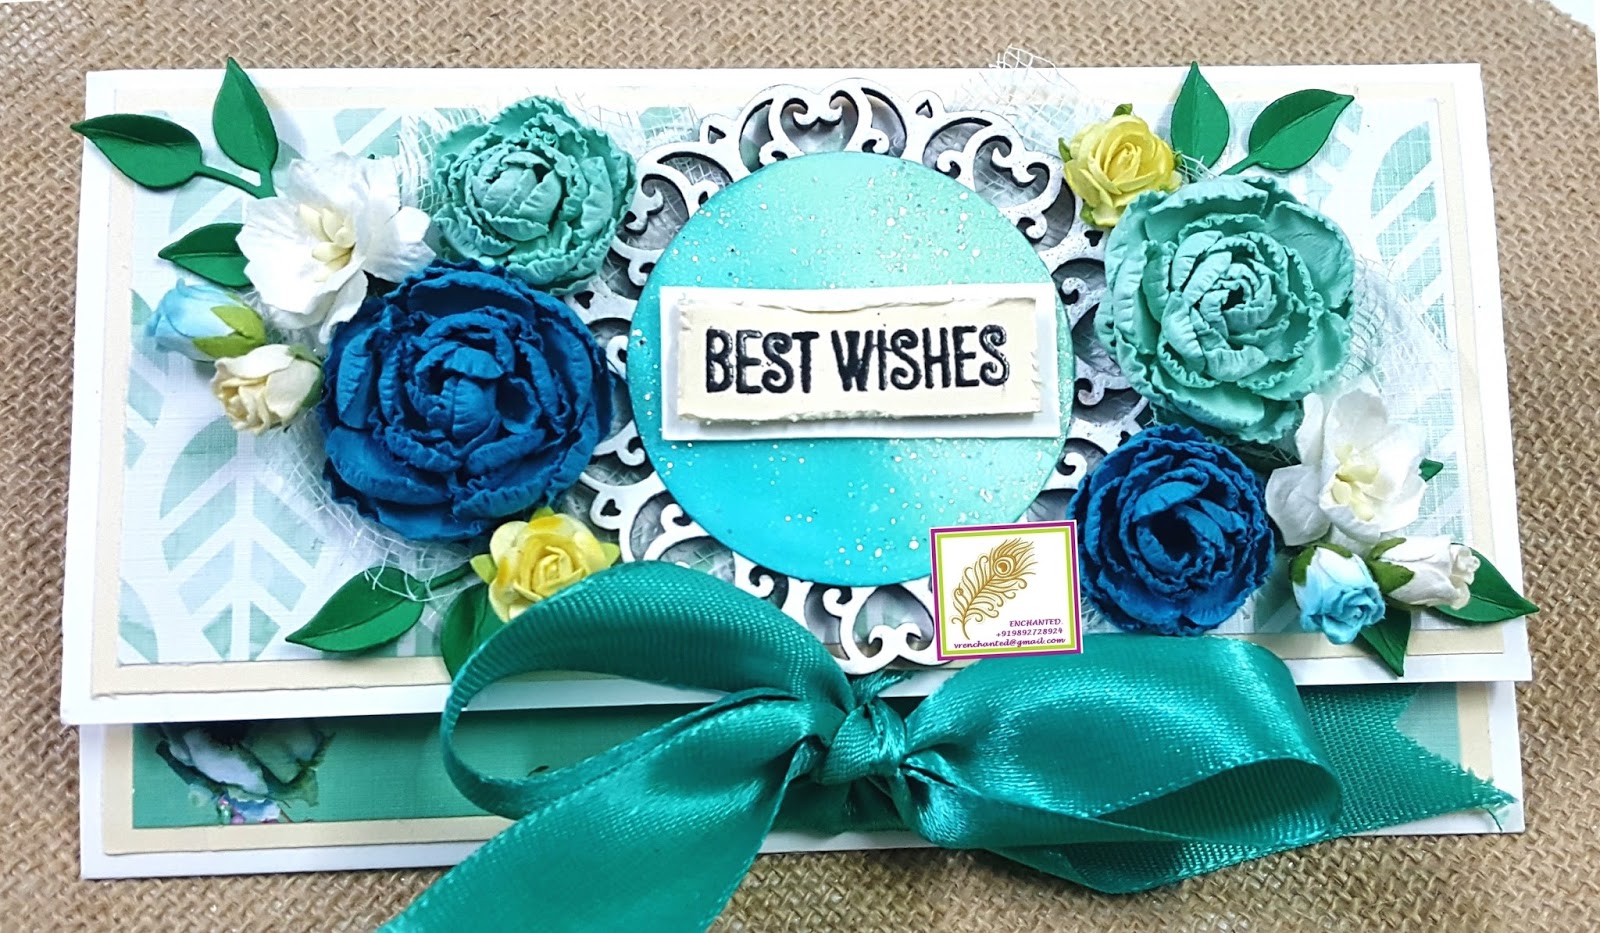
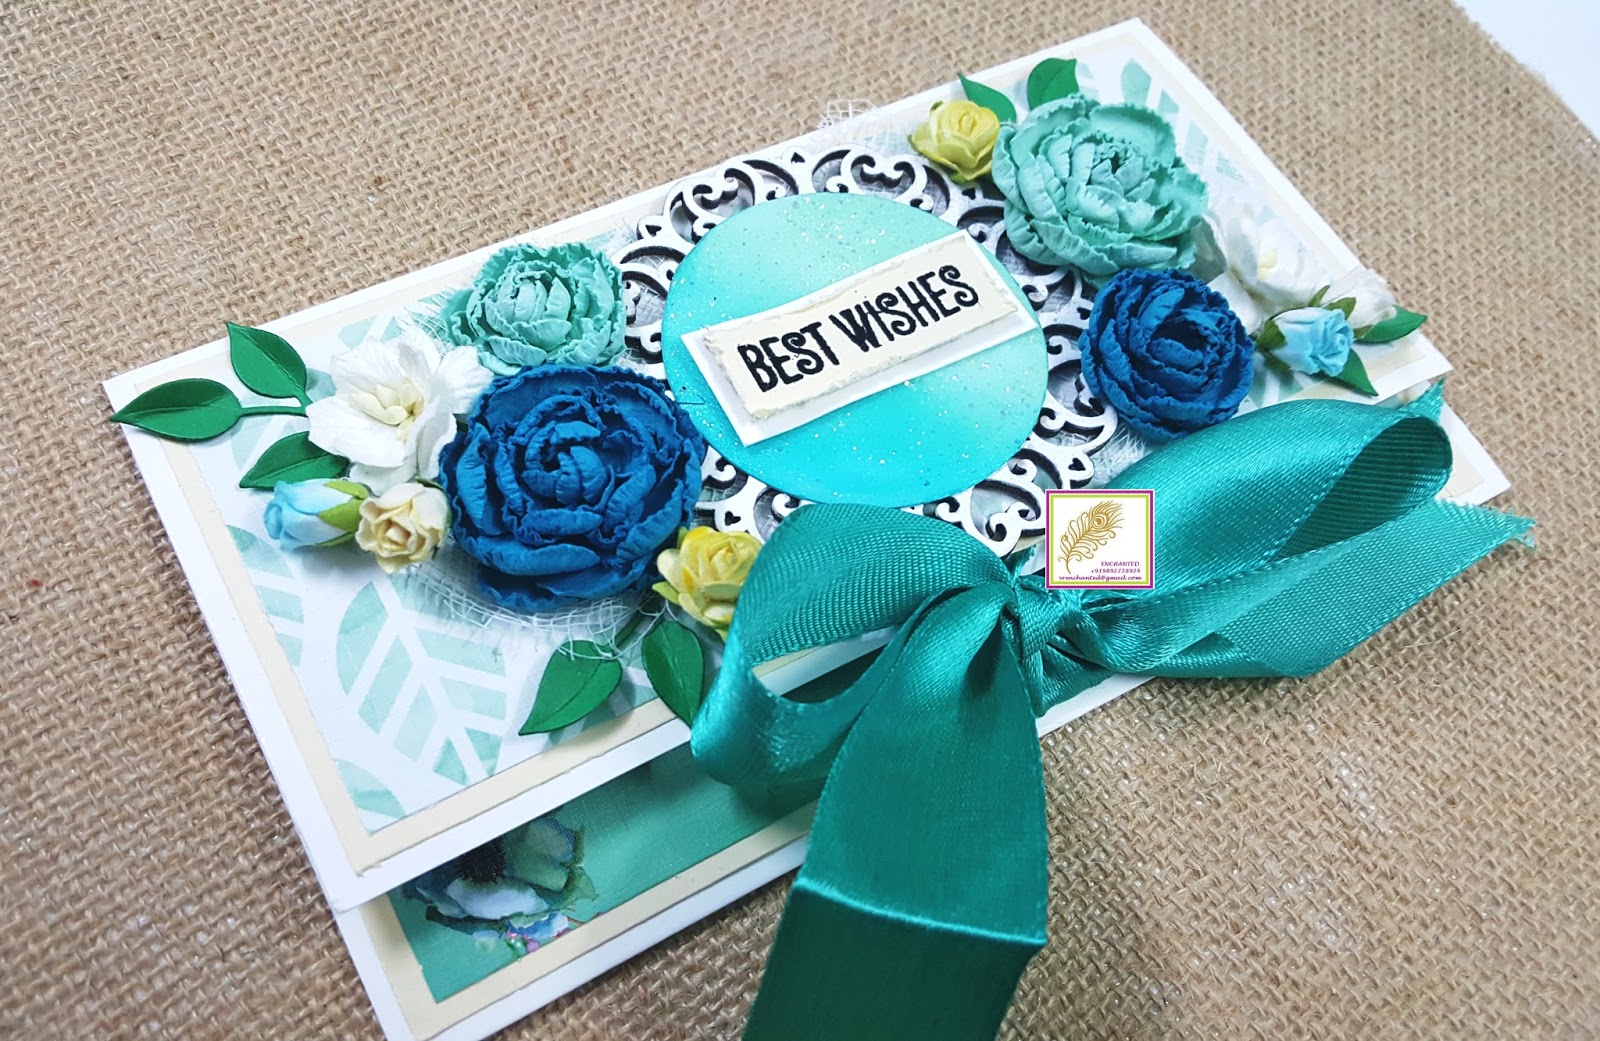
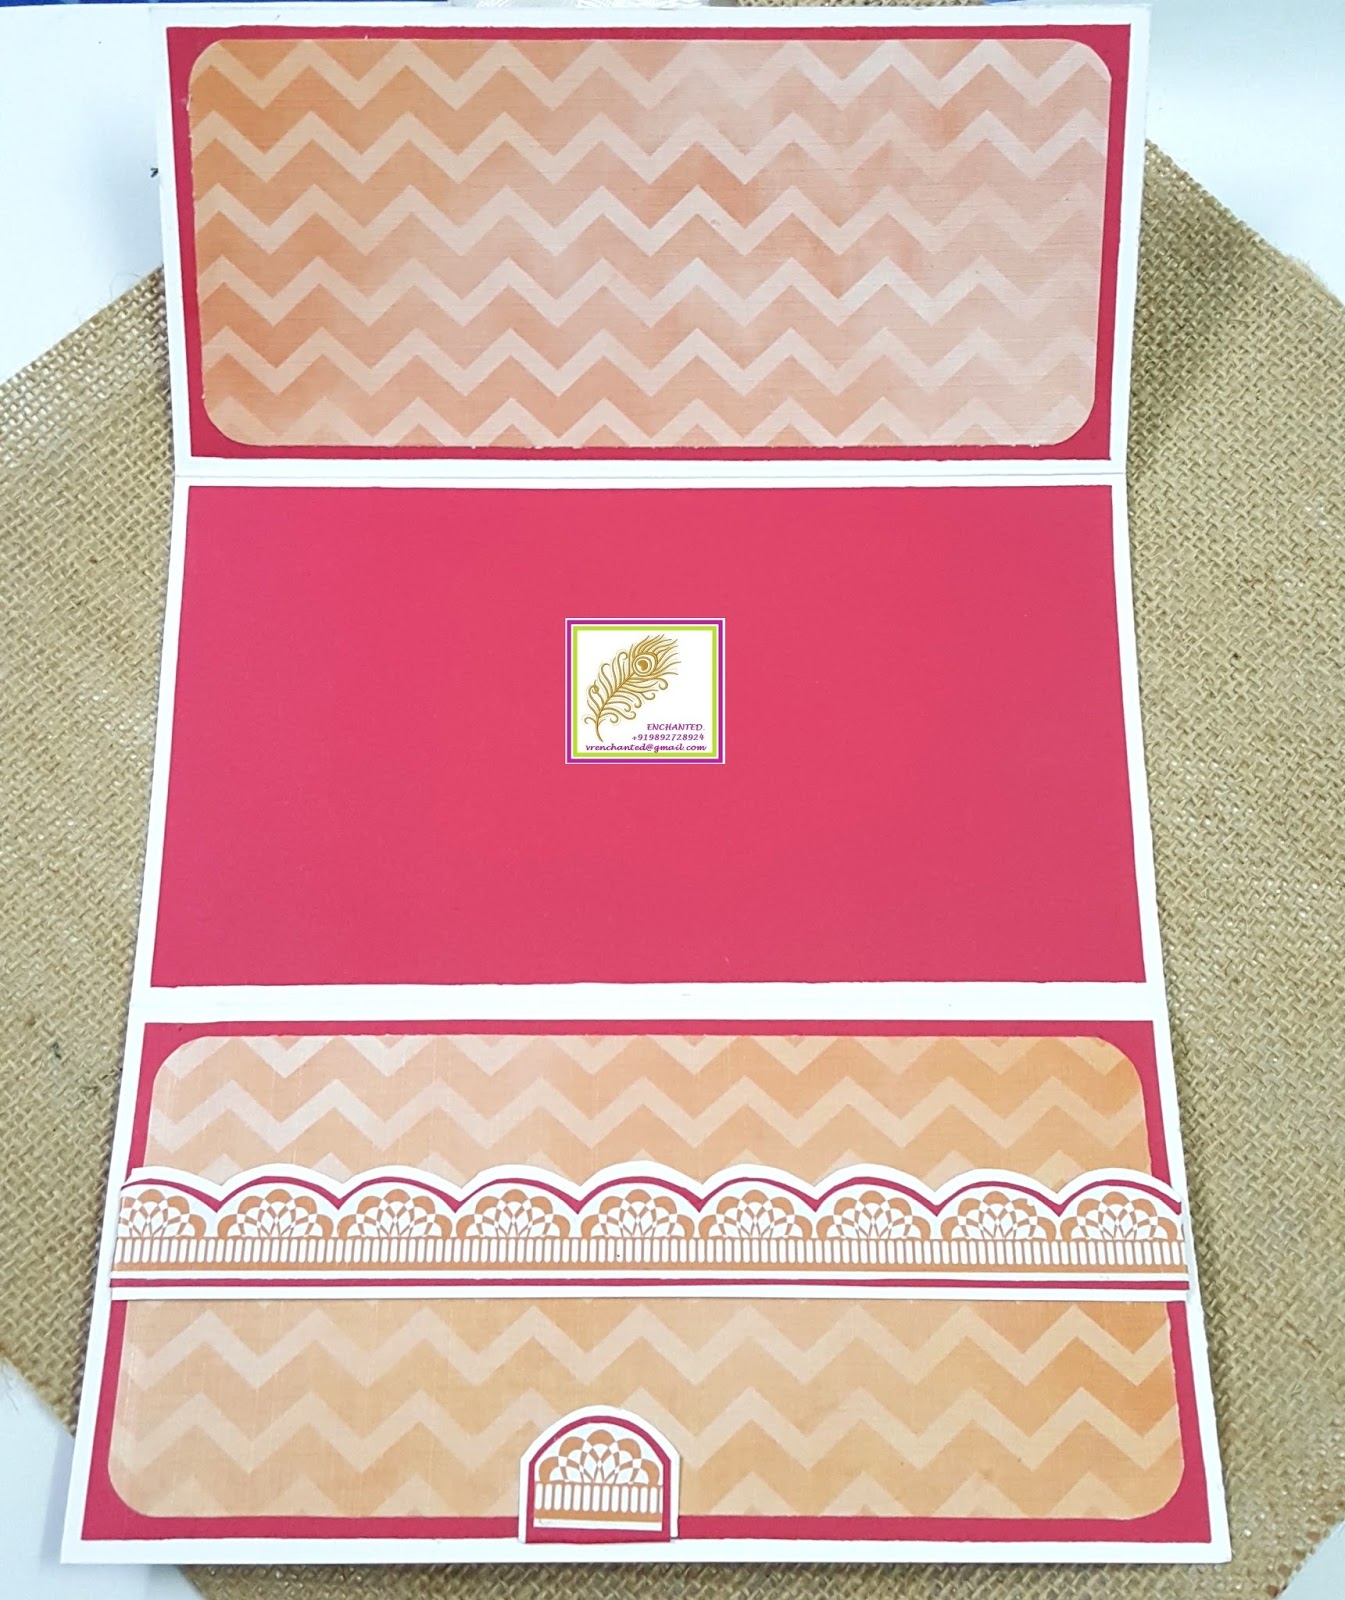
How are you all doing? Here I have a money envelope again for you all which is perfect for any occasion. I have a Best Wishes sentiment which is very generic and can be used for weddings, festivals or any other occasion. This is the third design in this line and I have a few more to share with you all.
In size while the envelope/card is 7" by 3.5" in size and is a 3 fold envelope. There is a small pocket to hold the money and the center part is empty to add our message. The top part is left empty and we can keep it that way or add a nice poem or some stamping depending on the occasion. Here are some close up shots of the envelope.
I am putting this project at the following blog challenges:
This is Mukta here and today I have for you my first DT project for Itsy Bitsy.......Wohoooo!!...I am surely excited to be a part of the Itsy Bitsy team and work alongside very talented ladies there. I hope to show you many crafty projects all with different techniques. There are going to be mixed media projects, scrapbooking, altered art and loads more from here onwards.....so stay tuned to the ItsyBitsy blog.
Here is a glimpse of my project
To know more about this layout, supplies, picture and a video tutorial please hop onto the ITSYBITSY blog by clicking HERE.
I am putting this layout up at the following challenges:
Hey guys
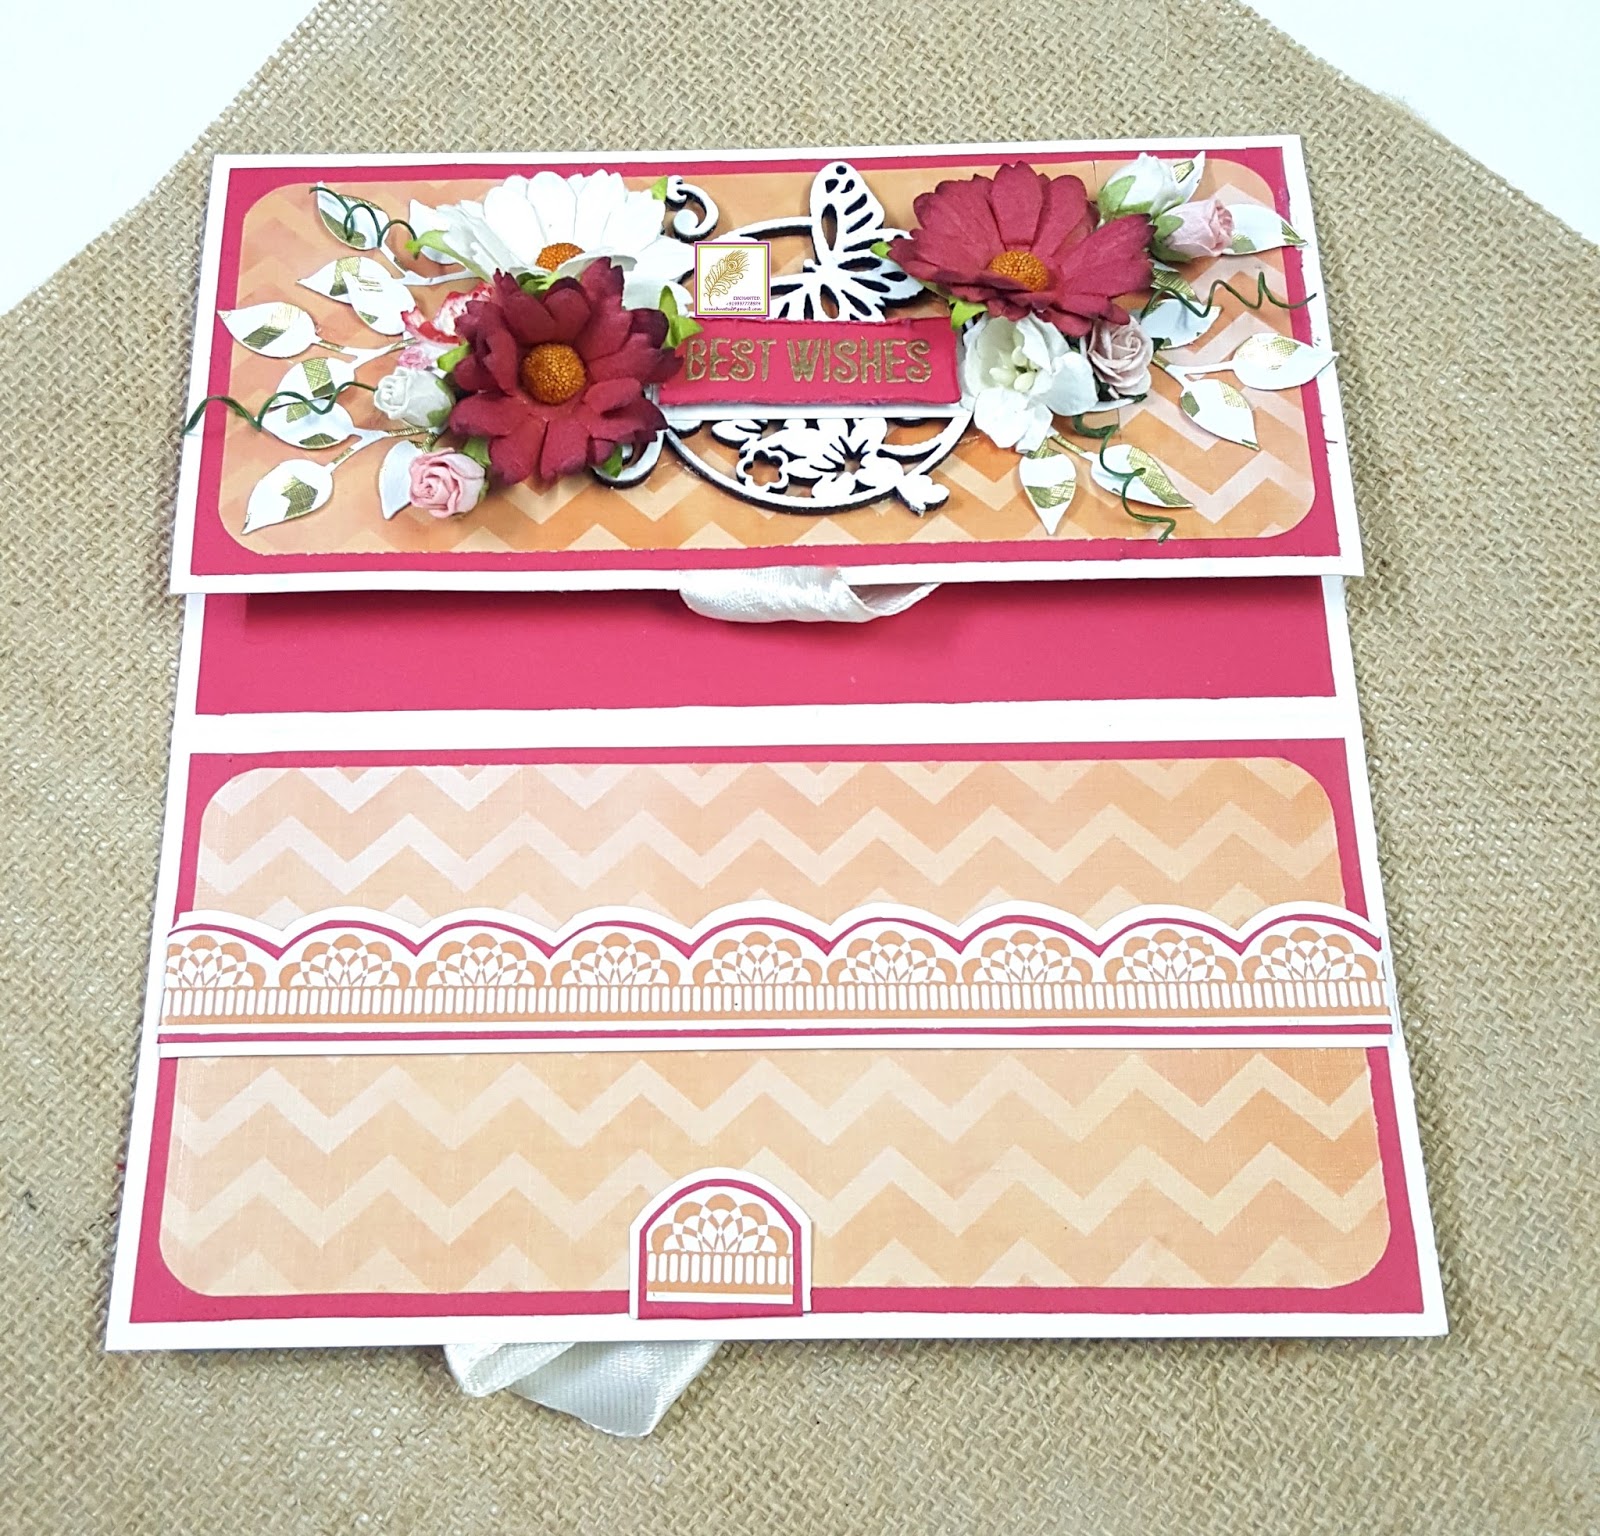
How are you all doing? Here I have a money envelope again for you all which is perfect for any occasion. I have a Best Wishes sentiment which is very generic and can be used for weddings, festivals or any other occasion. This is the second design in this line and I have a few more to share with you all.
Allsorts of challenge blog - Week 426 - Photo Inspiration - The colors and flowers in the pic have been an inspiration for the color scheme for my envelope.
In size while the envelope/card is 7" by 3.5" in size and is a 3 fold envelope. There is a small pocket to hold the money and the center part is empty to add our message. The top part is left empty and we can keep it that way or add a nice poem or some stamping depending on the occasion. Here are some close up shots of the envelope.
Supplies used:
Ranger White heat embossing powder
Ranger Tinsel Gold heat embossing powder
Wow heat embossing gun (ItsyBitsy)
Versamark watermark inkpad
Red cardstcock 250gsm (ItsyBitsy)
Daisies - Jasmine Siddhiqui
L'amour Paper pack (ItsyBitsy)
Chipboard elements - Garden Butterfly (ItsyBitsy)
White sakure flowers - The Craft Studio
Tim holtz Distressing Tool
Rose Buds - Adornos
Sentiment - Geometric Nature stamp set - Mudra craft stamps