Tuesday 23 May 2017

A shimmery Mother's Day Mixed media layout for keeps - GDT post for ItsyBitsy

Hey guys
I am back with a new project today and this one is for Mother's Day celebration. Mother can be anyone who looks after you and cares for you, worries for you in sickness and on regular days and keeps a track if you are eating your food on time. I stay with my Mother-in-law and father-in-law as my husband is mostly on rigs. 
Layout in yellow lights
Since Mother's Day is coming up, I made this project specially for my Mother-in-law. I am very happy because when I got married, I didn't get separated from my mother....God gave me another one who is just as kind hearted and concerned about me.
Layout in yellow lights
This one is for you maa....and I will make sure you read this post.....lol.
I have made this project as a GD post on Itsybitsy. So visit me on the link below to see and read the entire project with tons of information.
http://itsybitsyindia.blogspot.com/2017/05/a-shimmery-mixed-media-for-keeps.html

I am putting this project up at the following monthly challenges:-

1 LCC Challenge#125- make your own background
2Double D challenge - Flowers Galore
3Mixed Media and Art- May challenge

Scrapping4fun Challenge#90 - Ladies
5 Simonsaysstamp- Monday challenge- Little Critters - I have used butterfly embellishments as well as stamps.
6 ScrapBox - May challenge - Chipboard + Gold

I hope you like it and if you do leave me some love......Have a good day.

Tuesday 16 May 2017

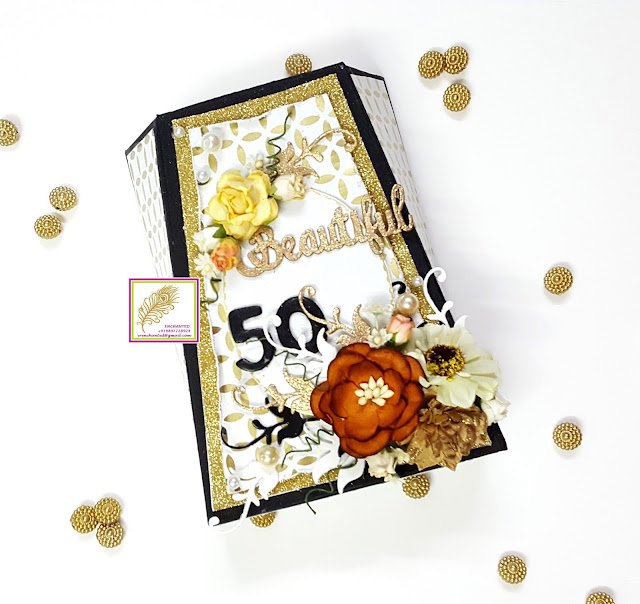
Beautiful 50 Gift box using ItsyBitsy Forever and Always paper pack - GDT post for ItsyBitsy

Hey guys
I have a new project to share with you all on ItsyBitsy blog where I am doing a guest DT post. Please hop along by click the link below and meet me there to know more about this beautiful gift box.
http://itsybitsyindia.blogspot.in/2017/05/beautiful-50-giftbox-using-forever-and.html
More pictures and list of supplies and tons of information awaits you at

I am putting this project up at
1 Craft Addiction Design team and challenge#5- Anything  but square
The Ribbon Girl May Challenge
3 Craftsneed Challenge May Challenge
4 Allsorts challenge blog - Ring-a-ring O Roses
5 Scrapping4fun challenge #90- Ladies
6 ScrapBox - May Challenge - Chipboard + Gold
Thank you and have a fab day ahead.....

Friday 12 May 2017

Congrats card for Newly Weds - GDT post for Scrapping4fun Challenge #90

Hello everyone
I am so excite to share this beautiful card which I have made for the GDT post at Scrapping4fun challenge blog for Challeneg#90. I am so glad they gave me this opportunity. I want you all to click the link below and come play at this month's challenge.
I have made a circular shabby chic card using Papericious The Wedding collection pattern paper....which is my current favorite and I am very soon going to do an album using the same papers.
So, what I basically did is cut a 6" diameter circle and then gave it scallop edge with my art scissors. Then I cut more circle which measured 1/8th inch smaller in size and from a silver glitter paper. I layered my pattern paper over this which was cut 1/4th of an inch small than the outermost circle. I distressed it at edges and popped it over some foam sheet to give it some dimension. Now, my card base is 53/4"circular base which I cut did a little offcenter to ensure that it had an hinge.....else I would get 2 separate circles.I glued my card base to the top and then started the work on my card front.
The sentiment in the center as well as the circular bouquet is from the paper pack. I colored all the flowers using Distress inks in Spun sugar, Picked Raspberry, Shaded Lilac and Fossilized Amber. For the leaves I used Twisted citron and Crushed Olive.

For the sentiment, I did distress ink blending with Shaded Lilac, Fossilized Amber and Spun Sugar. Then I clear heat embossed it and while it was still hot I sprinkled some clear sparkle dust on it. Thought, the camera doesn't quite catch it...It has an amazing shine and sparkle to it. I added some sparkle even to the flower centers using glossy accents. I then layered the sentiment and the floral frame onto a silver glitter paper and then mounted it on the card using some chipboard.
To give more texture to this card, I added some chipboard elements from Papericious which were coated with white gesso and little sparkle dust at a few places. Now, for the fun part....I did some flower layering using handmade mulberry flowers and leaves on a cheesecloth. I added little roses, rose buds and a bunch of pollens at a few places. The little floral vine on the left is something I made.....so much fun. Sprinkled some sequins and pearls and my card front was done.
On the inside, I just added a sentiment from the paper line with some silver glitter paper.....Kept it simple and left all the space for messages.
List of supplies
1 Papericious The wedding Collection paper pack
2 Itsybitsy Silver glitter paper
3 270gsm white Cardstock
4 Ranger Clear Heat embossing Powder - The Craft shop
5 Distress inks - Spun sugar, Picked Raspberry, Fossilized Amber, Crushed Olive, Twisted Citron, Shaded Lilac
6 Pearls
7 Pollens
8 Cheesecloth
9 Handmade Flowers, Leaves, Rose buds and single pollen flowers - The craft shop. The Crafter's corner
10 Tim Holtz distress tool
11 Silicon glue - Itsybitsy
12 Foam dimension tape
13 Clear sparkle powder
14 Glossy accents
15 Scallop Art scissor
16 Papericious pattern chipboard - Simple Lattice
17 Clear, white and silver sequins

I am putting my card up at the following monthly challenge at
1 Papericious May Challenge- Add flowers and diecuts
2 Addicted to Stamp and more - Anything goes
3 Craft Addiction Design team and challenge#5- Anything  but square
Mod Squad challenge - Lets color
The Ribbon Girl May Challenge
6 Craftsneed Challenge May Challenge
LCC Challenge #125 - Make your background
8 Simonsaysstamp Monday challenge - Its A Frame Up.
9 HLS May watercolor challenge
I hope you all like my card. Thank you for reading my post. Have a great day ahead.

Wednesday 10 May 2017

How to make hard covers for Journals/notebooks/junk journals

Hey guys
How are you all? I have a new tutorial for you all today. I will be showing how to make hard covers for junk journals in my video.....I hope you all will find this useful. This technique can be
used even for notebooks, albums, folios and other projects.
Thank you so much for visiting me and have a great day.

Tuesday 9 May 2017

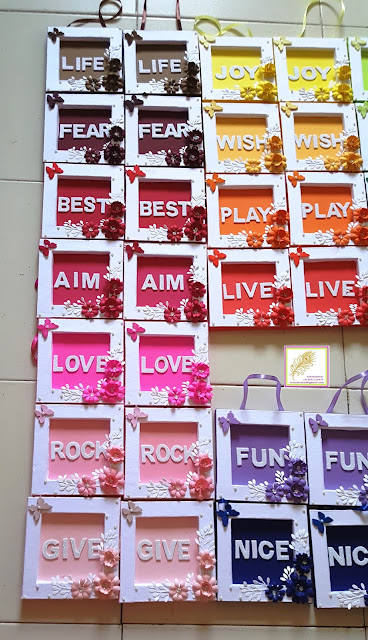
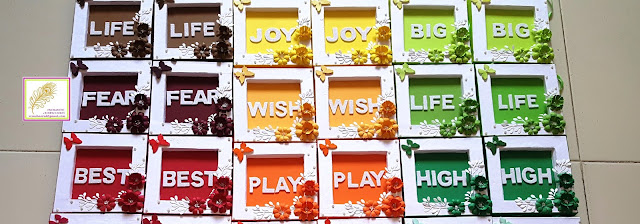
Motivational Photo Frames/ Shadow boxes with handmade flowers

Hello guys
How are you all doin? I am sharing my project today which I had forgotten about. I made these as Birthday favors for a little girl. I made these all from scratch.....it was a lot of work but super fun.

I started with making 4"square shadow boxes using sunboard and 1600gsm chipboard/ mountboard. Then I adhered colorful cardstock cut to 3" square carefully so that it centered. Then I added edges to which are 3/4"in thickness and the thickness of the entire frame is 1".
I covered the entire shadow box with white handmade paper and used some strong rubber based adhesive for this purpose.
Then, I made the loop using matching satin ribbons so that these frames can be easily hanged. To give it a more finished look, I covered the back as well as sides with matching cardstock. I also added a white handmade paper strip to the edges at the center so that all the corners are perfectly hidden.
Now, for the decorations. I did some diecutting and made 3 handmade flowers for each frame....All in all I made around 120 HANDMADE FLOWERS which was a big achievement. Instead of adding pollens int he center, I added some sparkle dots and confetti sequins....so much much. I completed the floral arrangement with some leaf diecuts from and a matching butterfly.  The butterflies are from Itsybitsy but all in white. I colored each one of it to match my cardstock. To finish off the frame, I added some flat back pearls at few places.
I added some words in the center which are formed using glitter foam letters. I do not have pics but the words are not complete as there is a second word to it and they were later stamped. So it looked like
GIVE LOVE
LIVE LIFE
PLAY FAIR and so on.
Thats about the procedure. I am listing the supplies used below and you can have a look it you are interested.

Supplies:
1 White handmade paper (ItsyBitsy)
2 Fevicryl Fevibond - Rubber based glue
3 Silicon Glue (ItsyBitsy)
4 Glossy accents
5 Sunboard
6 1600 gsm chipboard/ mountboard
7 Sizzex basic dies for flowers (ItsyBitsy)
8 Elizabeth craft design - Tiny leaves die
9 Flat back pearls (ItsyBitsy)
10 Butterflies (ItsyBitsy)
11 Distress inks (ItsyBitsy)
12 Satin ribbons (ItsyBitsy)
13 Cardstock (ItsyBitsy and local stores)

I am putting this project up at
1 Scrap and Craft Inspiration challeneg#3 - Handmade Flowers
2 Simon Says Stamp Monday Challenge - Frame it up
3 Try it on Tuesday - Little things mean a lot
Cute Card Thursday - Anything Goes
Inky chicks challeng e #82- Butterflies
Scrapping4fun Challenge #89 - Anything Goes
7  Scrapy Land challenge #65 - Anything Goes
Word Art Wednesday challenge #280-281 - Anything goes
9 Craftsneed May Challenge
10 RCS Challenge#3 - The Blooms Magic

Thank you for reading my post

Sunday 7 May 2017

Shabby Chic Mother's Day card.

Hey Guys
I hope you all are doing well. I am back with my new project which is a Shabby Chic Mother’s Day card. I have recently started trying my hand at some shabby chic projects and I hope you guys are liking it…… So anyways this one is made for my mother for the upcoming Mother’s Day. 
I have made this card using The Wedding collection paper pack from Papericious which I was hoarding for some time now and finally gave in the urge to use these beautiful papers….. I matter them with some silver glitter paper from Itsybitsy. I have distressed the pattern paper on the edges using Tim Holtz distressing tool.


On the paper, I added pattern chipboard element from Papericious. I coated it with some white gesso and let it dry thoroughly.  I made little shaker windows on the pattern chipboard using clear acetate sheets and some pretty Papericious  sequins, white star confetti stars and silver sparkle dots……Looks really cute.  To add a little sparkle, I added little clear sparkle powder and Twinklet Diamond Dust at few places.


Now was the fun part where I just went crazy with adding all the flowers and leaves. I used Papericious lace, Mulberry flowers like rose, lily and poppy and single pollen flowers, green diecut leaves and some diecuts from Elizabeth craft designs.

I added a sentiment “Happy Mother’s Day” from Just Rite stamps and some butterflies from the same stamp set on some vellum. I heat embossed it with some Black Ranger embossing powder and then used Abandoned Coral distress ink on the butterflies to give it some color. To finish the card front, I added some clear, silver and white cup sequins……cute right.

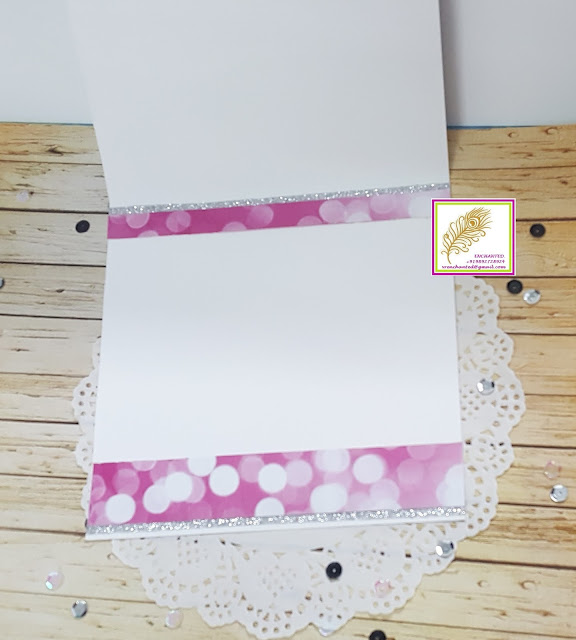
On the inside, I kept it pretty plain. I just added a bokeh effect paper from the same paper pack with some silver glitter paper. That finished my card.

Supplies used :-
1 Papericious The wedding Collection paper pack
2 Papericious Baby Pink square sequins
3 Papericious Laces and Trims - Leaves
4 Itsybitsy Silver glitter paper
5 270gsm white Cardstock
6 Just rite Floral Basket clear Stamp -  The Crafter's corner
7 Ranger black Heat embossing Powder - The Craft shop
8 Elizabeth Craft Designs die - Leafy Branch 2 -  The Crafter's corner
9 Handmade Flowers, Leaves and single pollen flowers - The craft shop. The Crafter's corner
10 Clear vellum - Itsybitsy
11 Silicon glue - Itsybitsy
12 Foam dimension tape
13 Clear sparkle powder
14 Twinklets diamond dust
15 Acetate sheet - Itsybitsy
16 Papericious pattern chipboard - round Hearts
17 Clear, white and silver sequins

Here is a video to view my card up close

I am putting my card up at the following blog challenges
Papericious April challenge - Add a Shaker element

Craft Stamper Magazine - Take it Make it May Challenge
Cute Card Thursday - Anything Goes
CWS Challenge #14 - Flowers
Inky chicks challenge #82- Butterflies
Scrapping4fun Challenge #89 - Anything Goes
 

10 Scrapy Land challenge #65 - Anything Goes
I hope you guys like my card. I was in a hurry this time and couldn’t do and tutorial but I am planning to do one very soon…Thank you for reading this post. Till next time…. Keep crafting.